
hexo 搭建博客
一、准备
1、环境
- 安装node
node -v # v16.16.0

npm -v # 8.11.0
- 安装git
git --version # git version 2.32.1 (Apple Git-133)
2、账号
- github 注册
二、安装 hexo 工具
npm install -g hexo-cli # 全局安装
三、建站
hexo init <folder>
cd <folder>
npm install # yarn
- 目录
.
├── _config.yml
├── package.json
├── scaffolds
├── source
|   ├── _drafts
|   └── _posts
└── themes
- 本地启动
npm run server # yarn server
四、配置
您可以在 _config.yml 中修改大部分的配置。
1、网站
# Site
title: 520wsl
subtitle: 'Love Love Love'
description: '是谁给你的勇气???梁静茹吗?'
keywords: vue javascript python php
author: Mad Dragon
language: zh-CN
timezone: 'Asia/Shanghai'
| 参数 | 描述 |
|---|---|
| title | 网站标题 |
| subtitle | 网站副标题 |
| description | 网站描述 |
| keywords | 网站的关键词。支持多个关键词。 |
| author | 您的名字 |
| language | 网站使用的语言。对于简体中文用户来说,使用不同的主题可能需要设置成不同的值,请参考你的主题的文档自行设置,常见的有 zh-Hans和 zh-CN。 |
| timezone | 网站时区。Hexo 默认使用您电脑的时区。请参考 时区列表 进行设置,如 America/New_York, Japan, 和 UTC 。一般的,对于中国大陆地区可以使用 Asia/Shanghai。 |
2、网址
# URL
## Set your site url here. For example, if you use GitHub Page, set url as 'https://username.github.io/project'
url: http://520wsl.github.io
permalink: :year/:month/:day/:title/
permalink_defaults:
pretty_urls:
  trailing_index: true # Set to false to remove trailing 'index.html' from permalinks
  trailing_html: true # Set to false to remove trailing '.html' from permalinks
| 参数 | 描述 | 默认值 |
|---|---|---|
| url | 网址, 必须以 http:// 或 https:// 开头 | |
| root | 网站根目录 | url’s pathname |
| permalink | 文章的 永久链接 格式 | :year/:month/:day/:title/ |
| permalink_defaults | 永久链接中各部分的默认值 | |
| pretty_urls | 改写 permalink 的值来美化 URL | |
| pretty_urls.trailing_index | 是否在永久链接中保留尾部的 index.html,设置为 false 时去除 | true |
| pretty_urls.trailing_html | 是否在永久链接中保留尾部的 .html, 设置为 false 时去除 (对尾部的 index.html无效) | true |
五、ssh 密钥、公钥生成(SSH Keys)
1、检查是否安装ssh
wangshilin@wangshilindeMacBook-Pro git % ssh
usage: ssh [-46AaCfGgKkMNnqsTtVvXxYy] [-B bind_interface]
           [-b bind_address] [-c cipher_spec] [-D [bind_address:]port]
           [-E log_file] [-e escape_char] [-F configfile] [-I pkcs11]
           [-i identity_file] [-J [user@]host[:port]] [-L address]
           [-l login_name] [-m mac_spec] [-O ctl_cmd] [-o option] [-p port]
           [-Q query_option] [-R address] [-S ctl_path] [-W host:port]
           [-w local_tun[:remote_tun]] destination [command]
wangshilin@wangshilindeMacBook-Pro git %
2、生成ssh keys
ssh-keygen -t rsa -C "your email@example.com"
# 引号里面填写你的注册时的邮箱地址,比如xxxxxxxx@163.com
【第一次回车】之后会出现:
Generating public/private rsa key pair.
Enter file in which to save the key (/Users/wangshilin/.ssh/id_rsa):
# 到这里可以直接回车将密钥按默认文件进行存储
【第二次回车】然后会出现:
Enter passphrase (empty for no passphrase):
# 这里是要你输入密码,其实不需要输什么密码,直接回车就行
Enter same passphrase again:
# 再回车
【第三次回车、第四次回车】接下来屏幕会显示:
Your identification has been saved in /Users/wangshilin/.ssh/id_rsa
Your public key has been saved in /Users/wangshilin/.ssh/id_rsa.pub

The key fingerprint is:
# 这里是各种字母数字组成的字符串,结尾是你的邮箱
SHA256:xxxxxxxxxxxx xxxxxxx@163.com

The key's randomart image is:
# 这里也是各种字母数字符号组成的字符串
+---[RSA 3072]----+
|   .             |
|  + .            |
|   O +       .   |
|  + / o     . .  |
|   % X .S  o .   |
|    O . ..+ .o . |
|     . .oo =+ =  |
|      ..Eoooo+ +.|
|        . oooo+o+|
+----[SHA256]-----+
四次回车后,我们的SSH keys就已经生成了,存在C:/Users/自己电脑的用户名(如未新建,默认是Administrator)/.ssh/id_rsa.pub文件中。
六、在GitHub账户中添加你的公钥
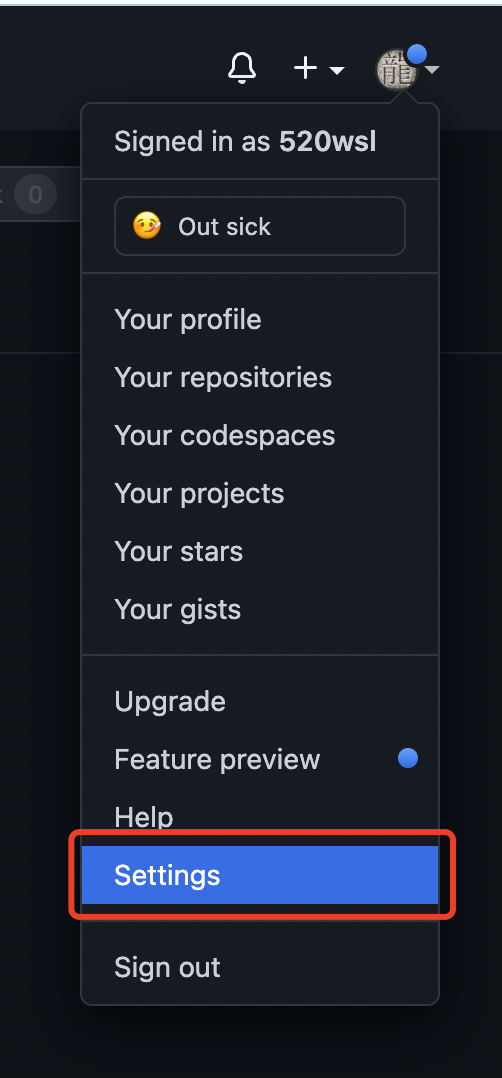
1、登陆github,进入Settings
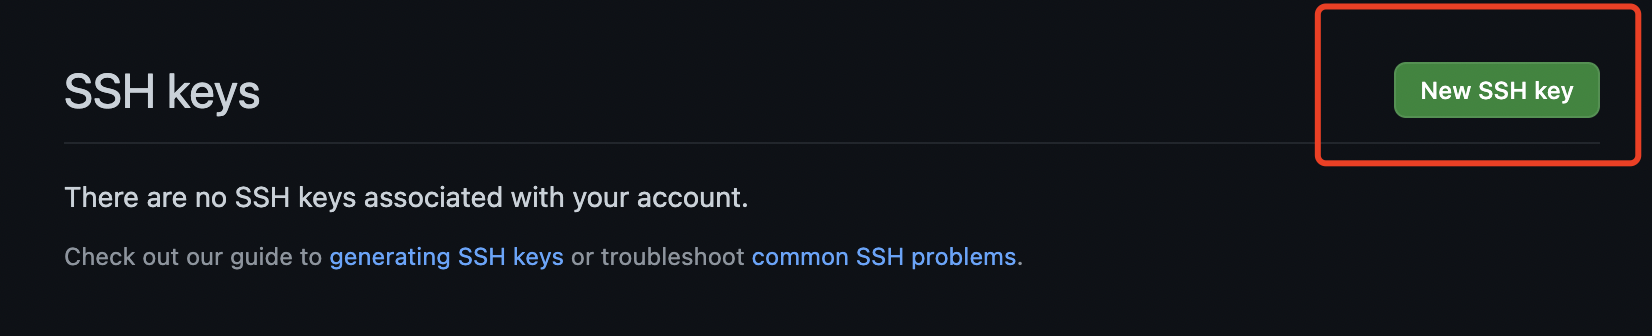
2、点击 SSH and GPG Keys:

3、选择 New SSH key
4、添加SSH keys步骤如图
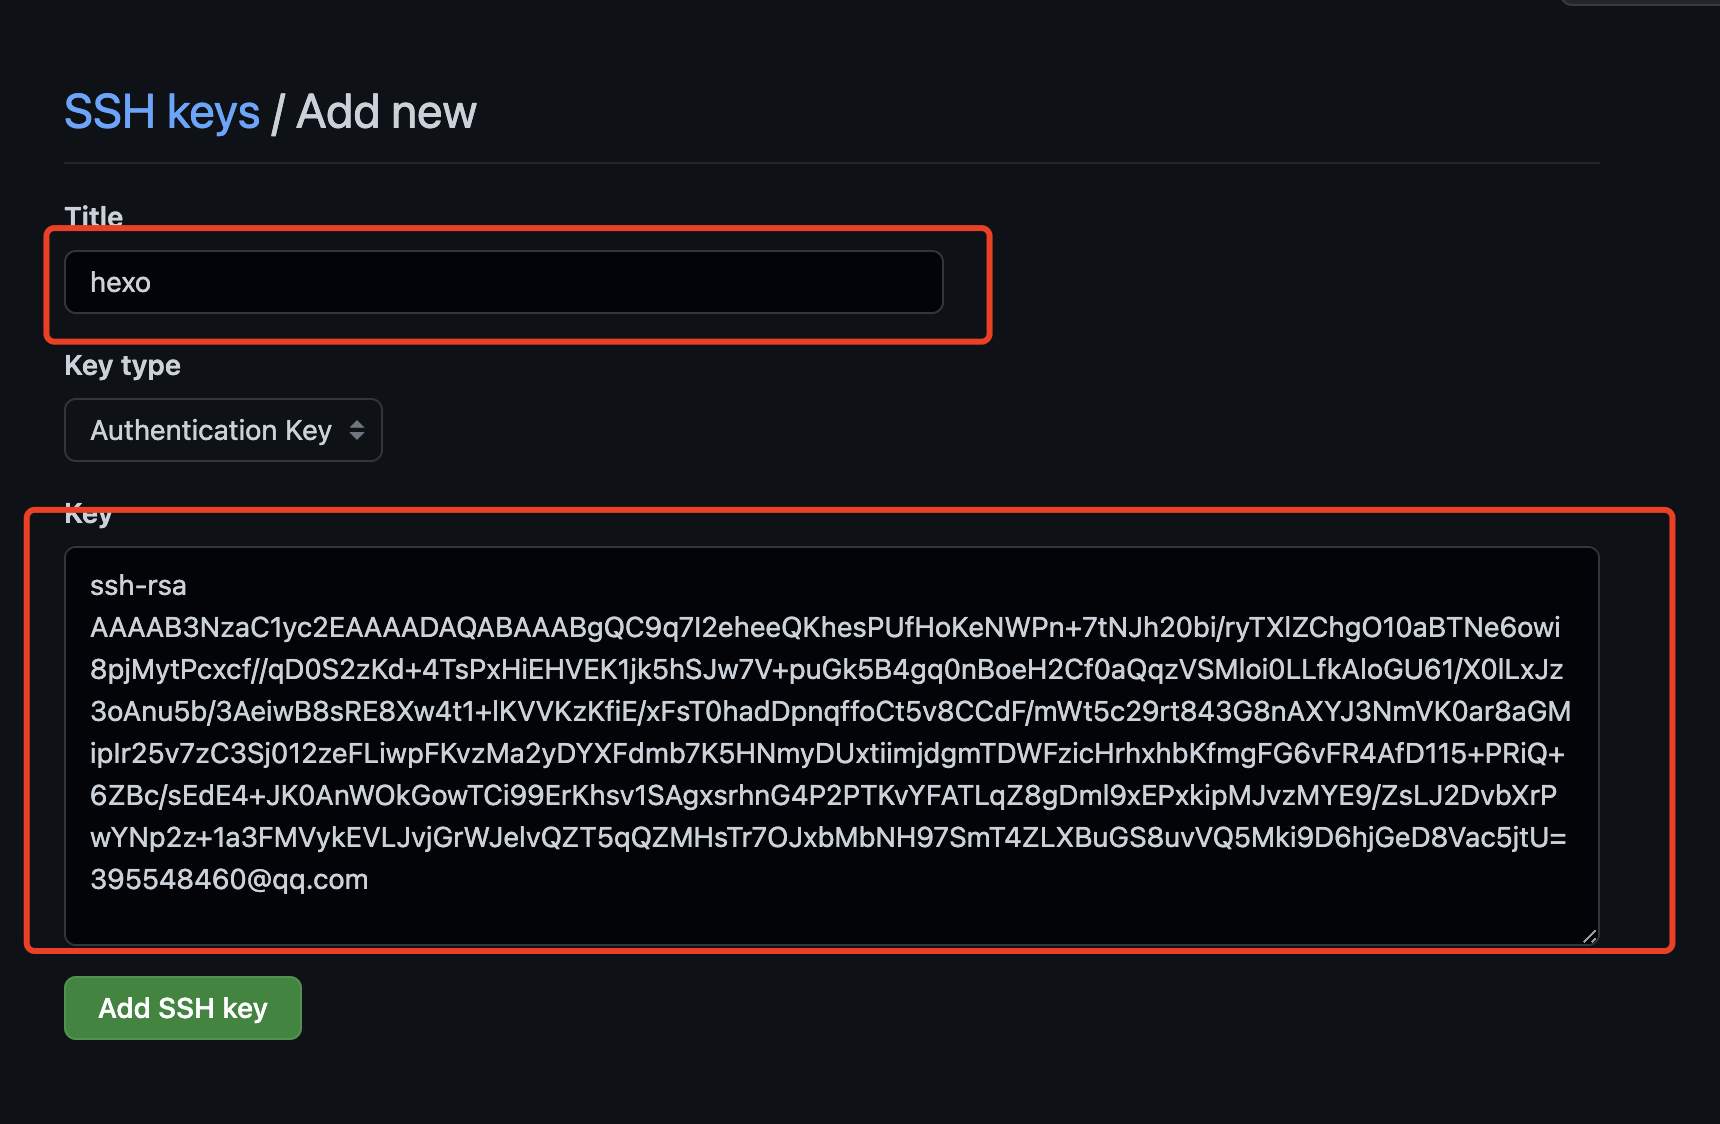
- Title随便写
- Key ssh生成的公钥,id_rsa.pub的内容复制粘贴过来
5、测试SSH是否绑定成功
输入以下命令:注意:git@github.com不要做任何更改!
ssh -T git@github.com
回车,再次输入yes后回车,就会显示:
wangshilin@wangshilindeMacBook-Pro git % ssh -T git@github.com
Hi 520wsl! You've successfully authenticated, but GitHub does not provide shell access.
wangshilin@wangshilindeMacBook-Pro git %
6、配置Git个人信息
Git 会根据用户的名字和邮箱来记录提交,GitHub 也是用这些信息来做权限的处理,输入以下命令进行个人信息的设置,把名称和邮箱替换成自己的,名字可以不是GitHub的昵称,但为了方便记忆,建议与GitHub一致。
git config --global user.name "此处填你的用户名"
git config --global user.email "此处填你的邮箱"
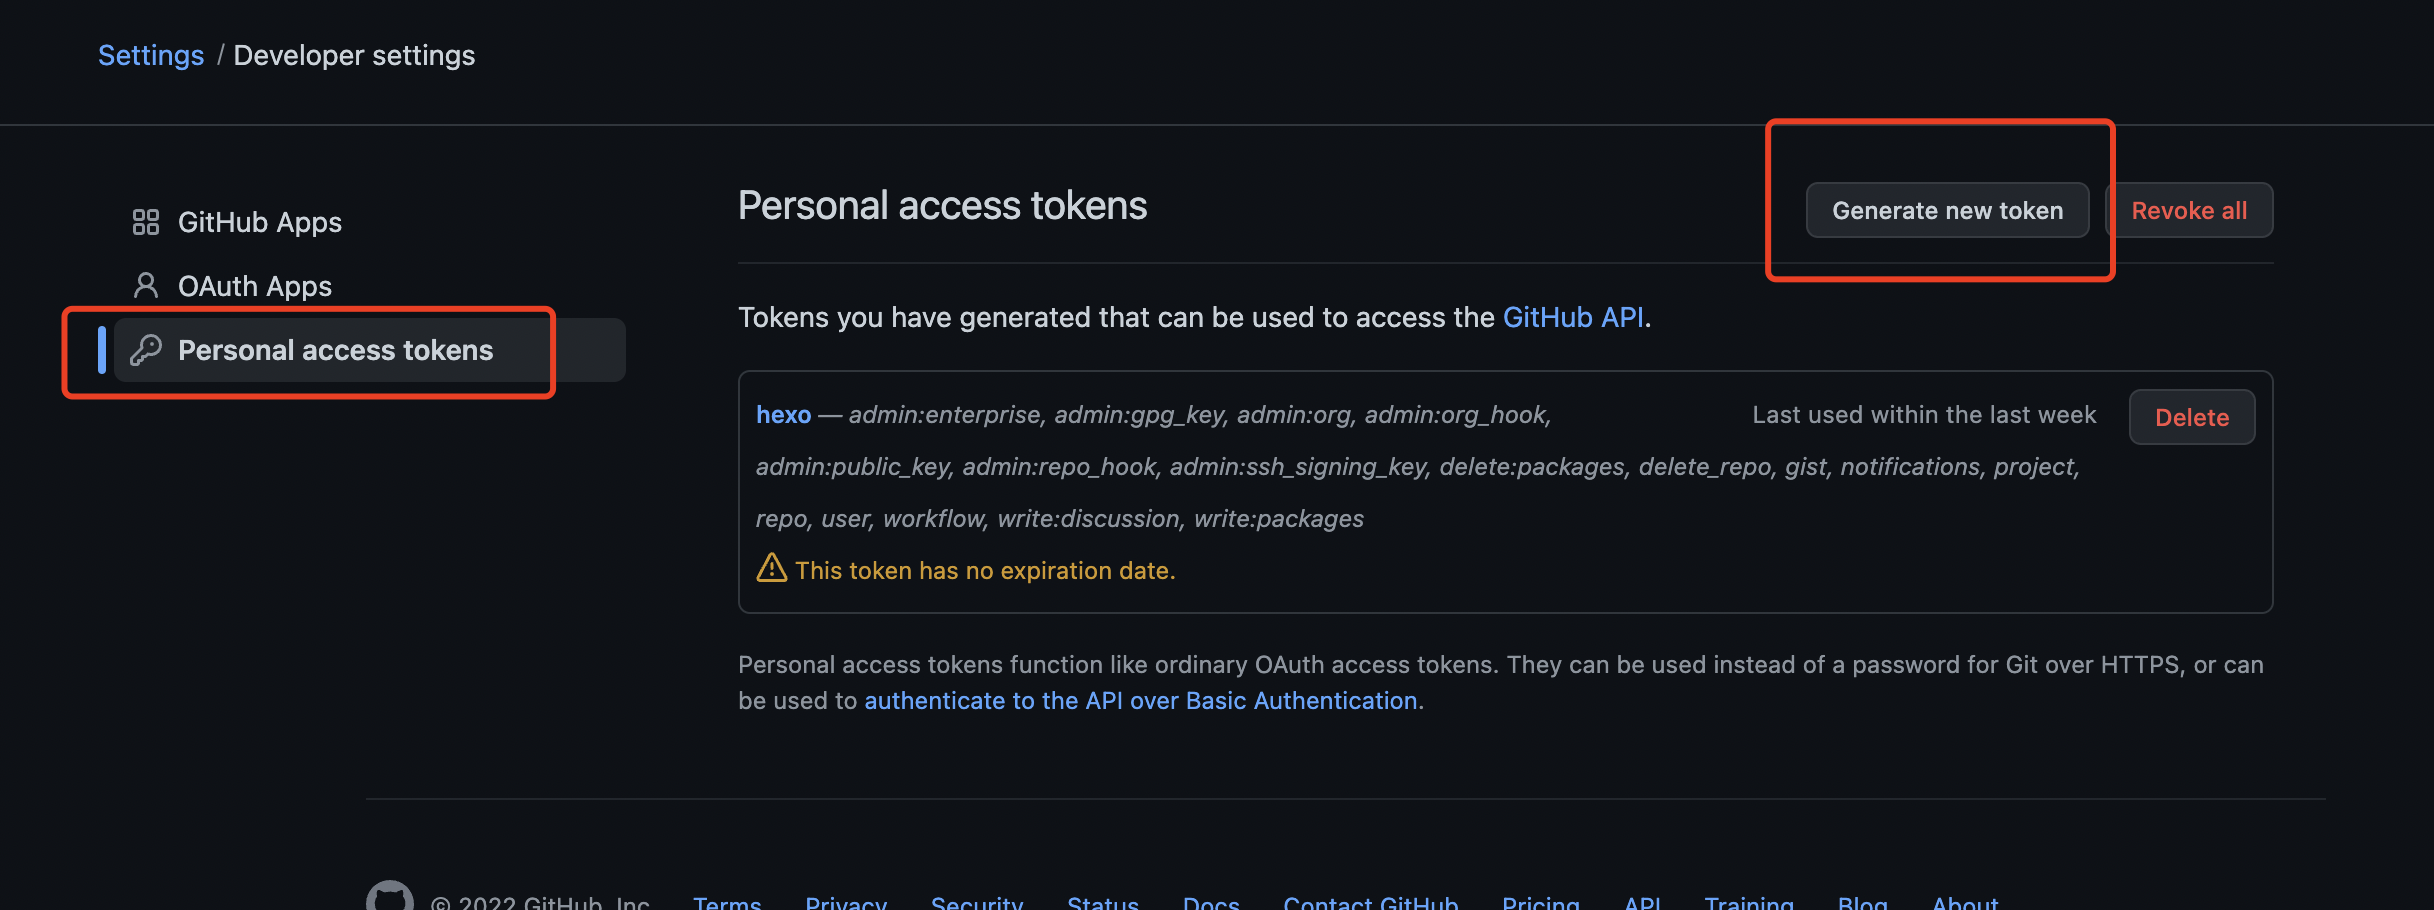
七、生成 github令牌
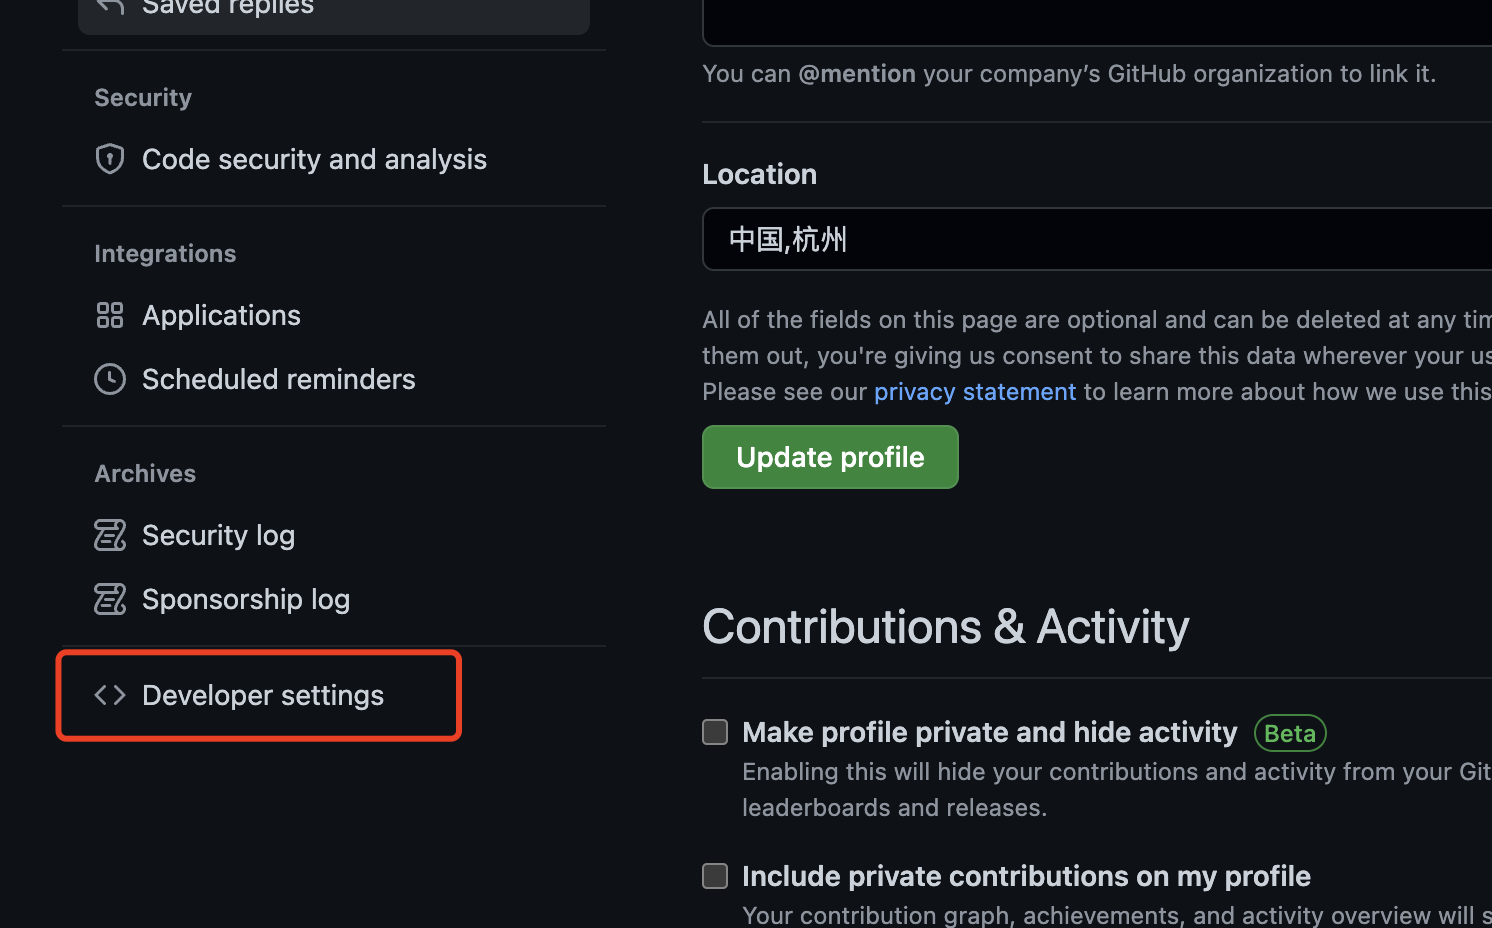
1、登陆github,找到Settings中的Developer settings(开发者设置),其中有一个Personal access tokens,点进去就可以Generate new token了。
2、生成令牌
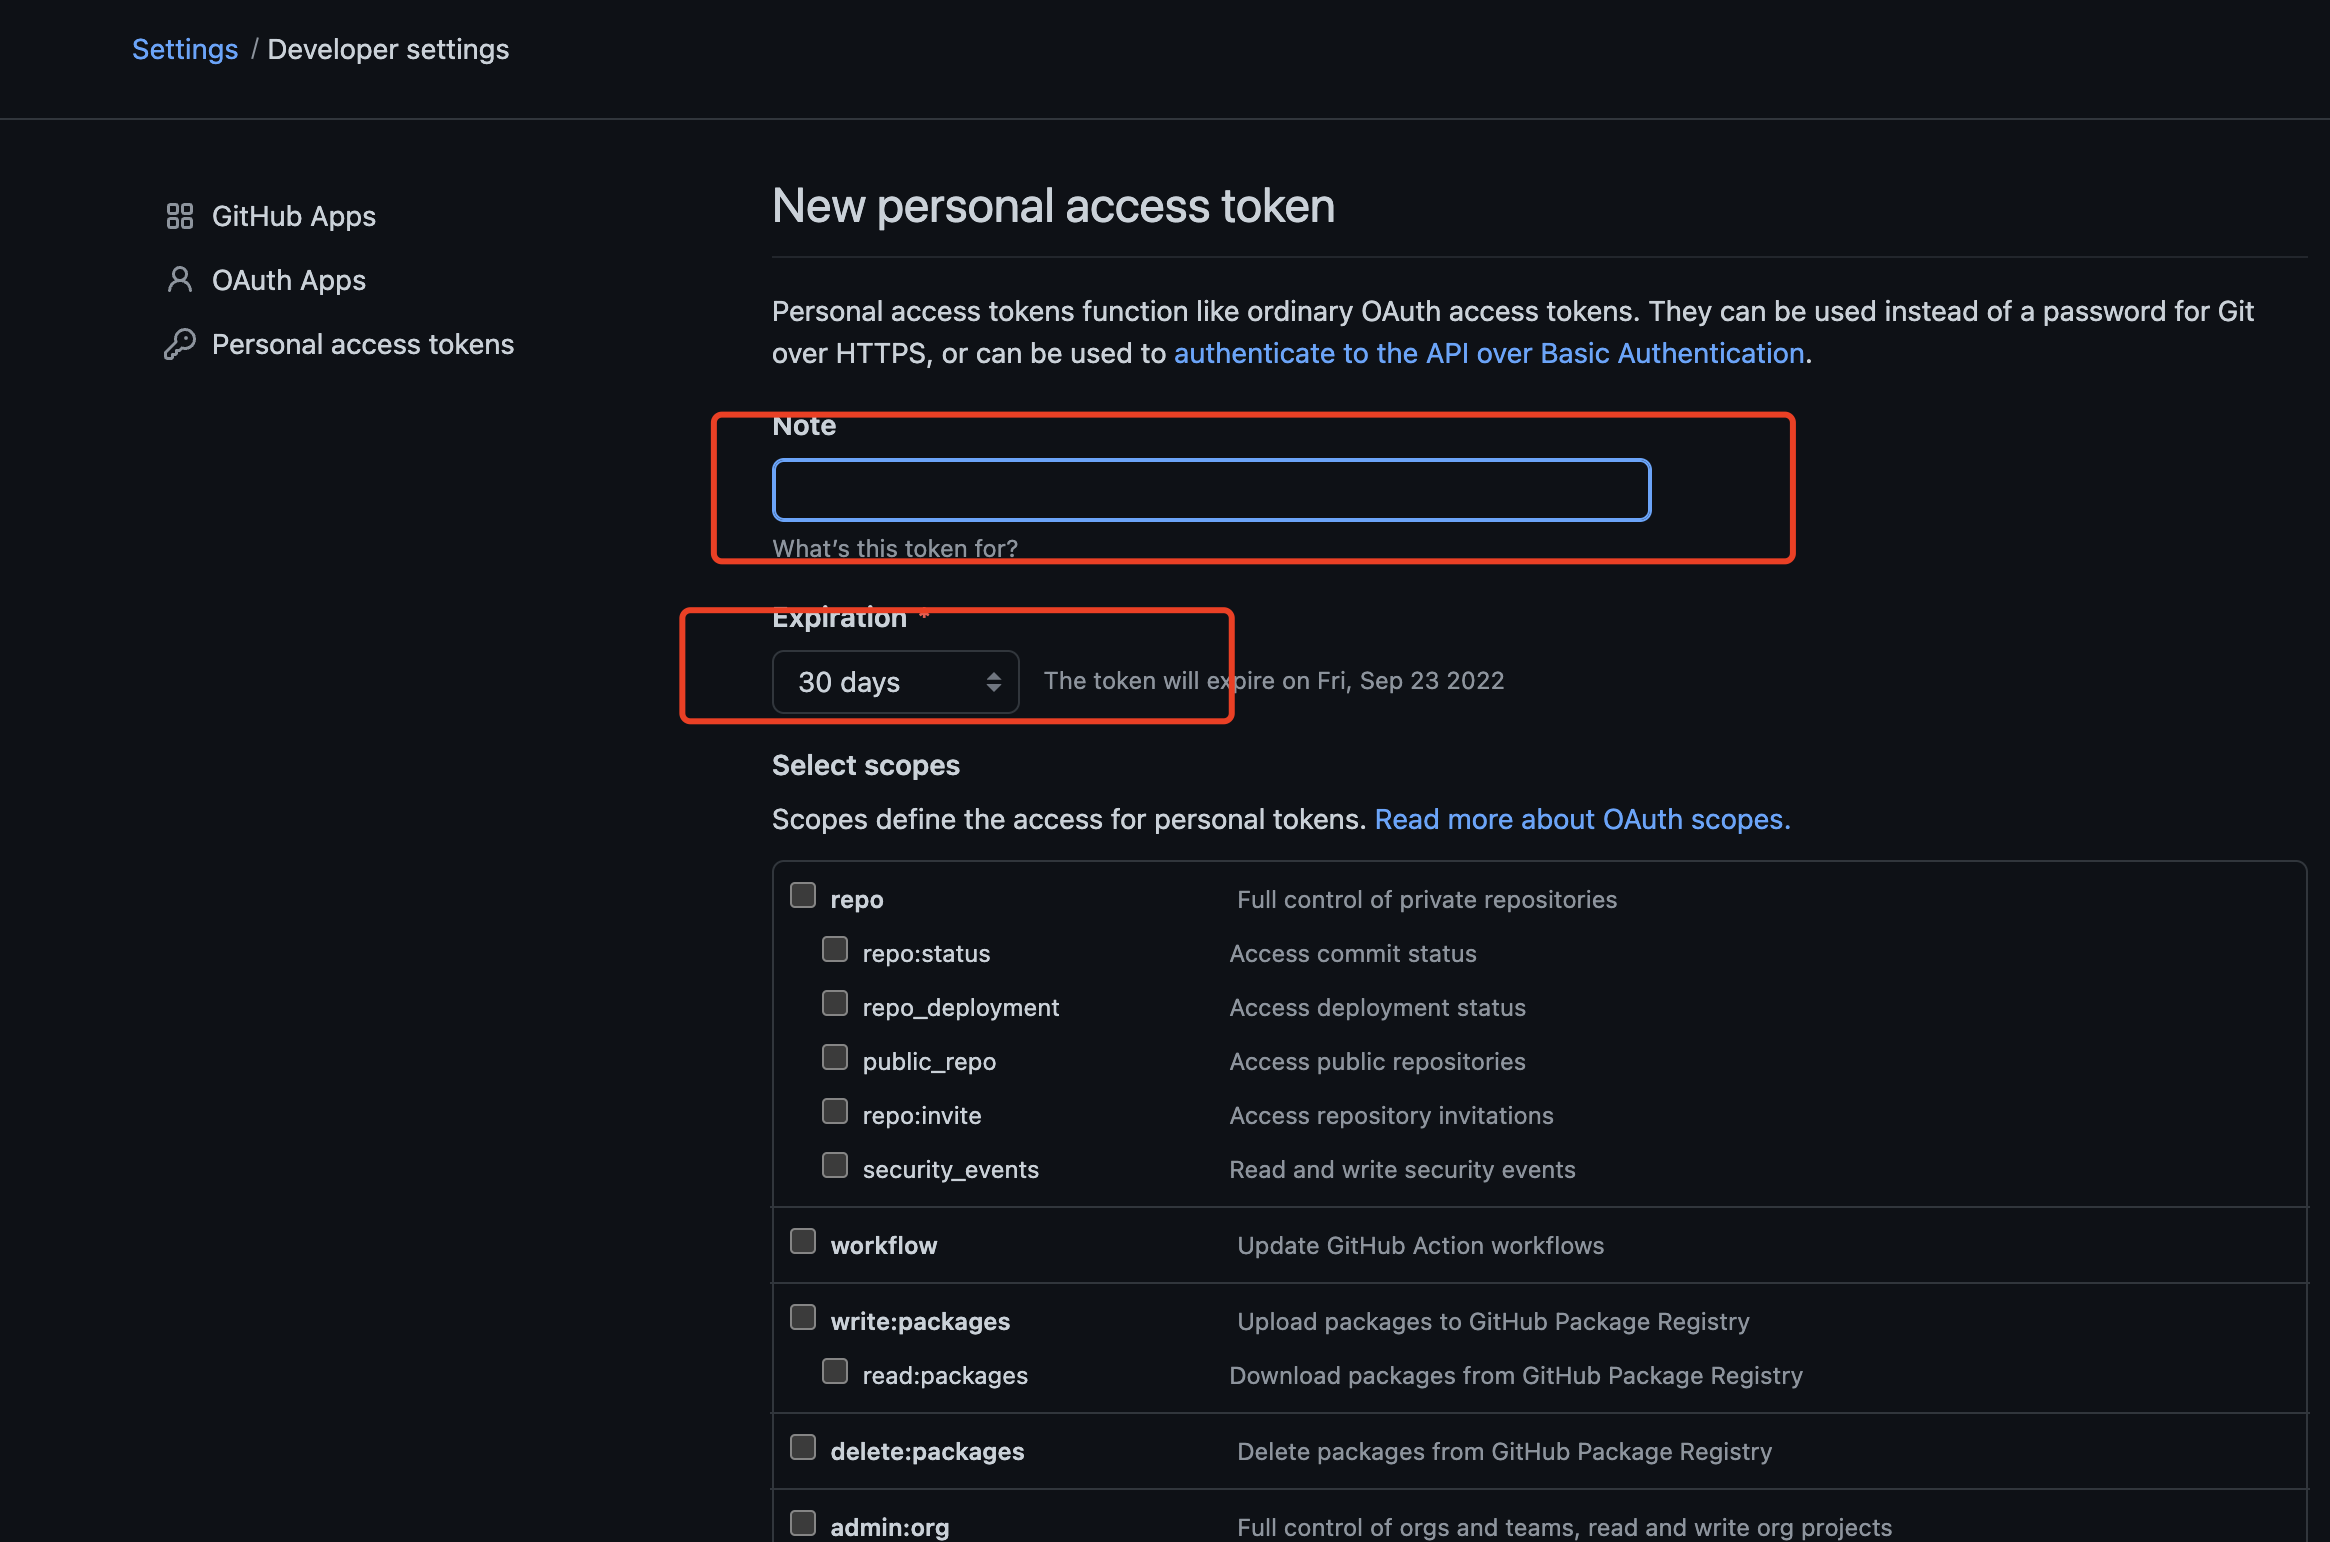
Select scopes 最好全选
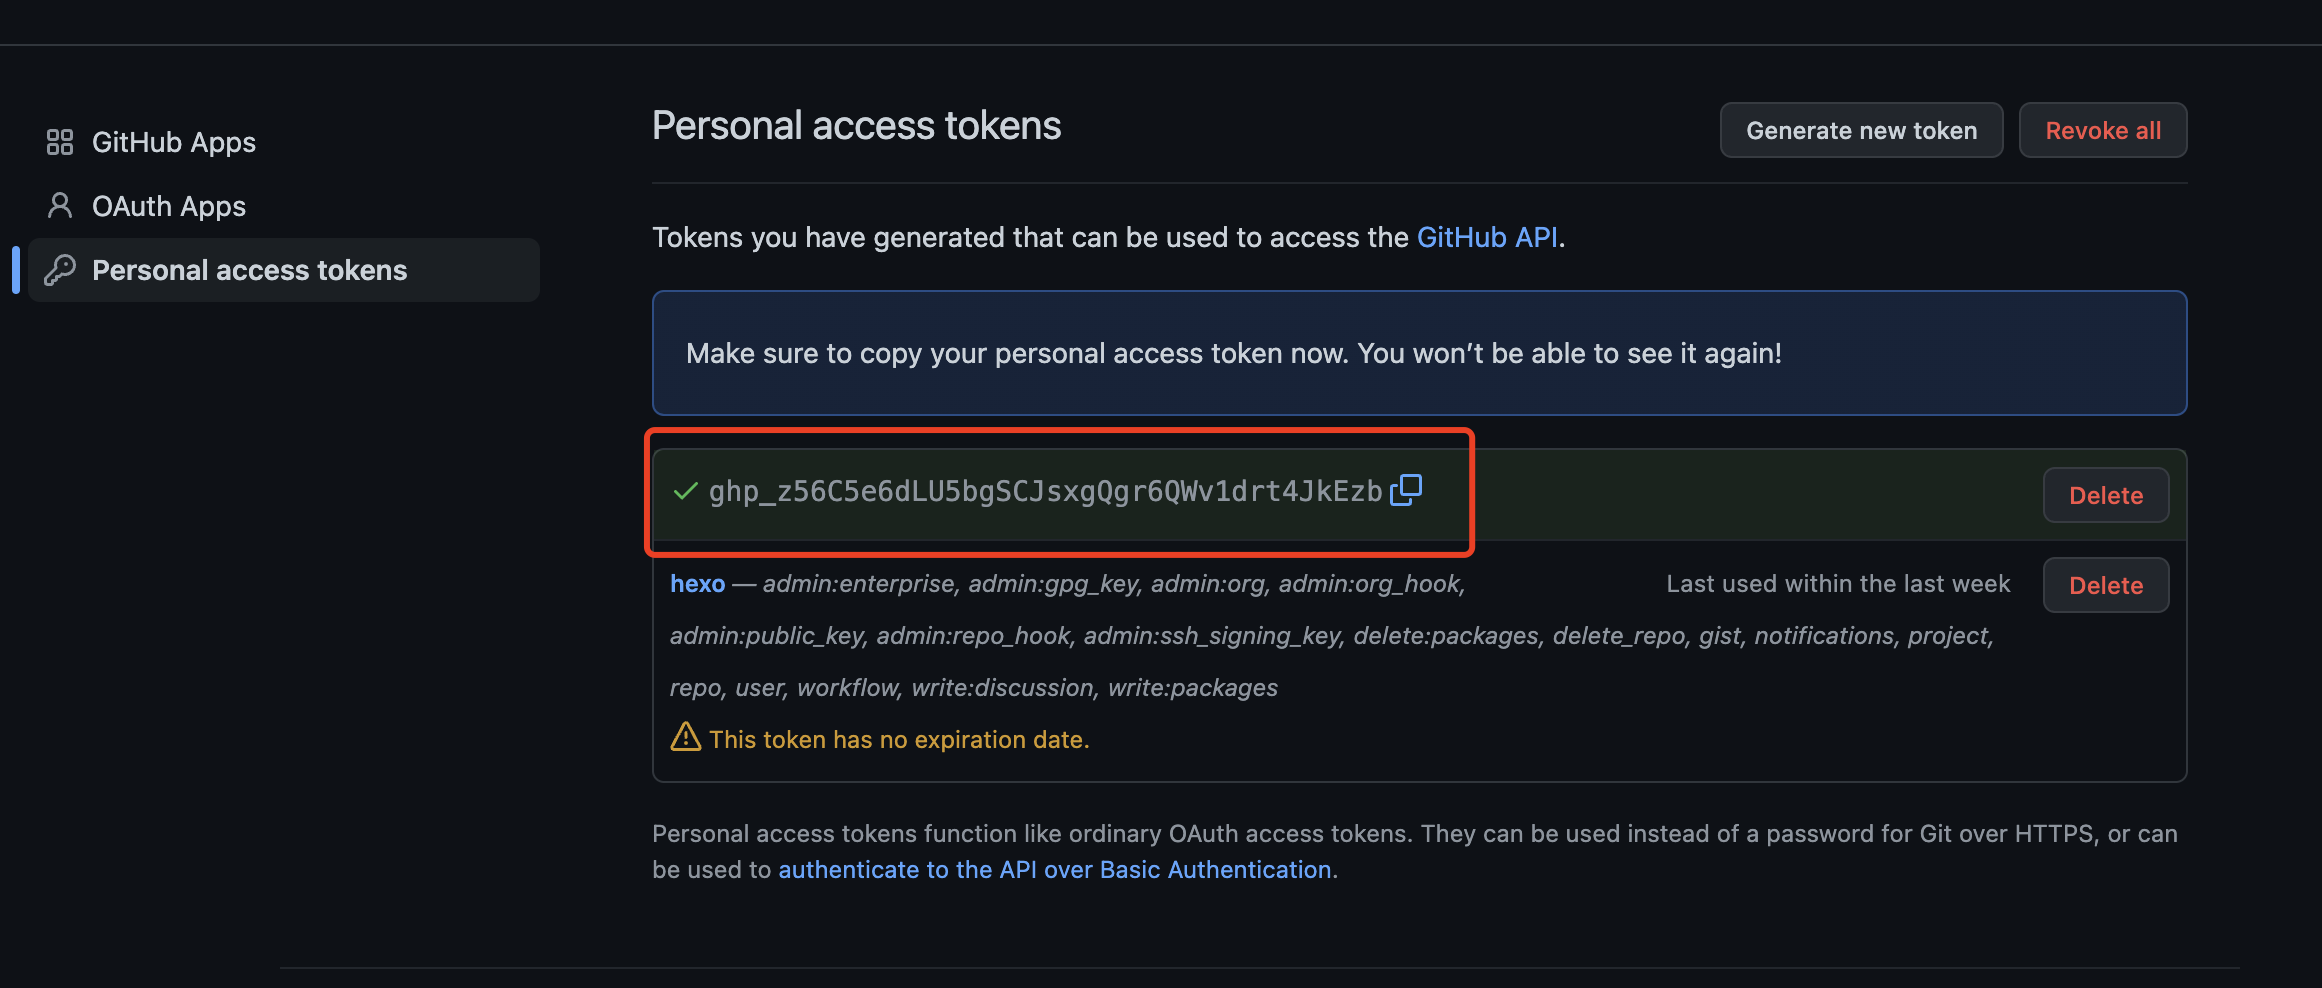
点击Generate token后,会显示生成的一段代替密码的序列号,一键复制之后将它存在方便找到的地方,因为下一次使用令牌时这里的序列号将被隐藏。
八、Hexo发布
1、创建和你github登陆名同名的项目 yourname.github.io
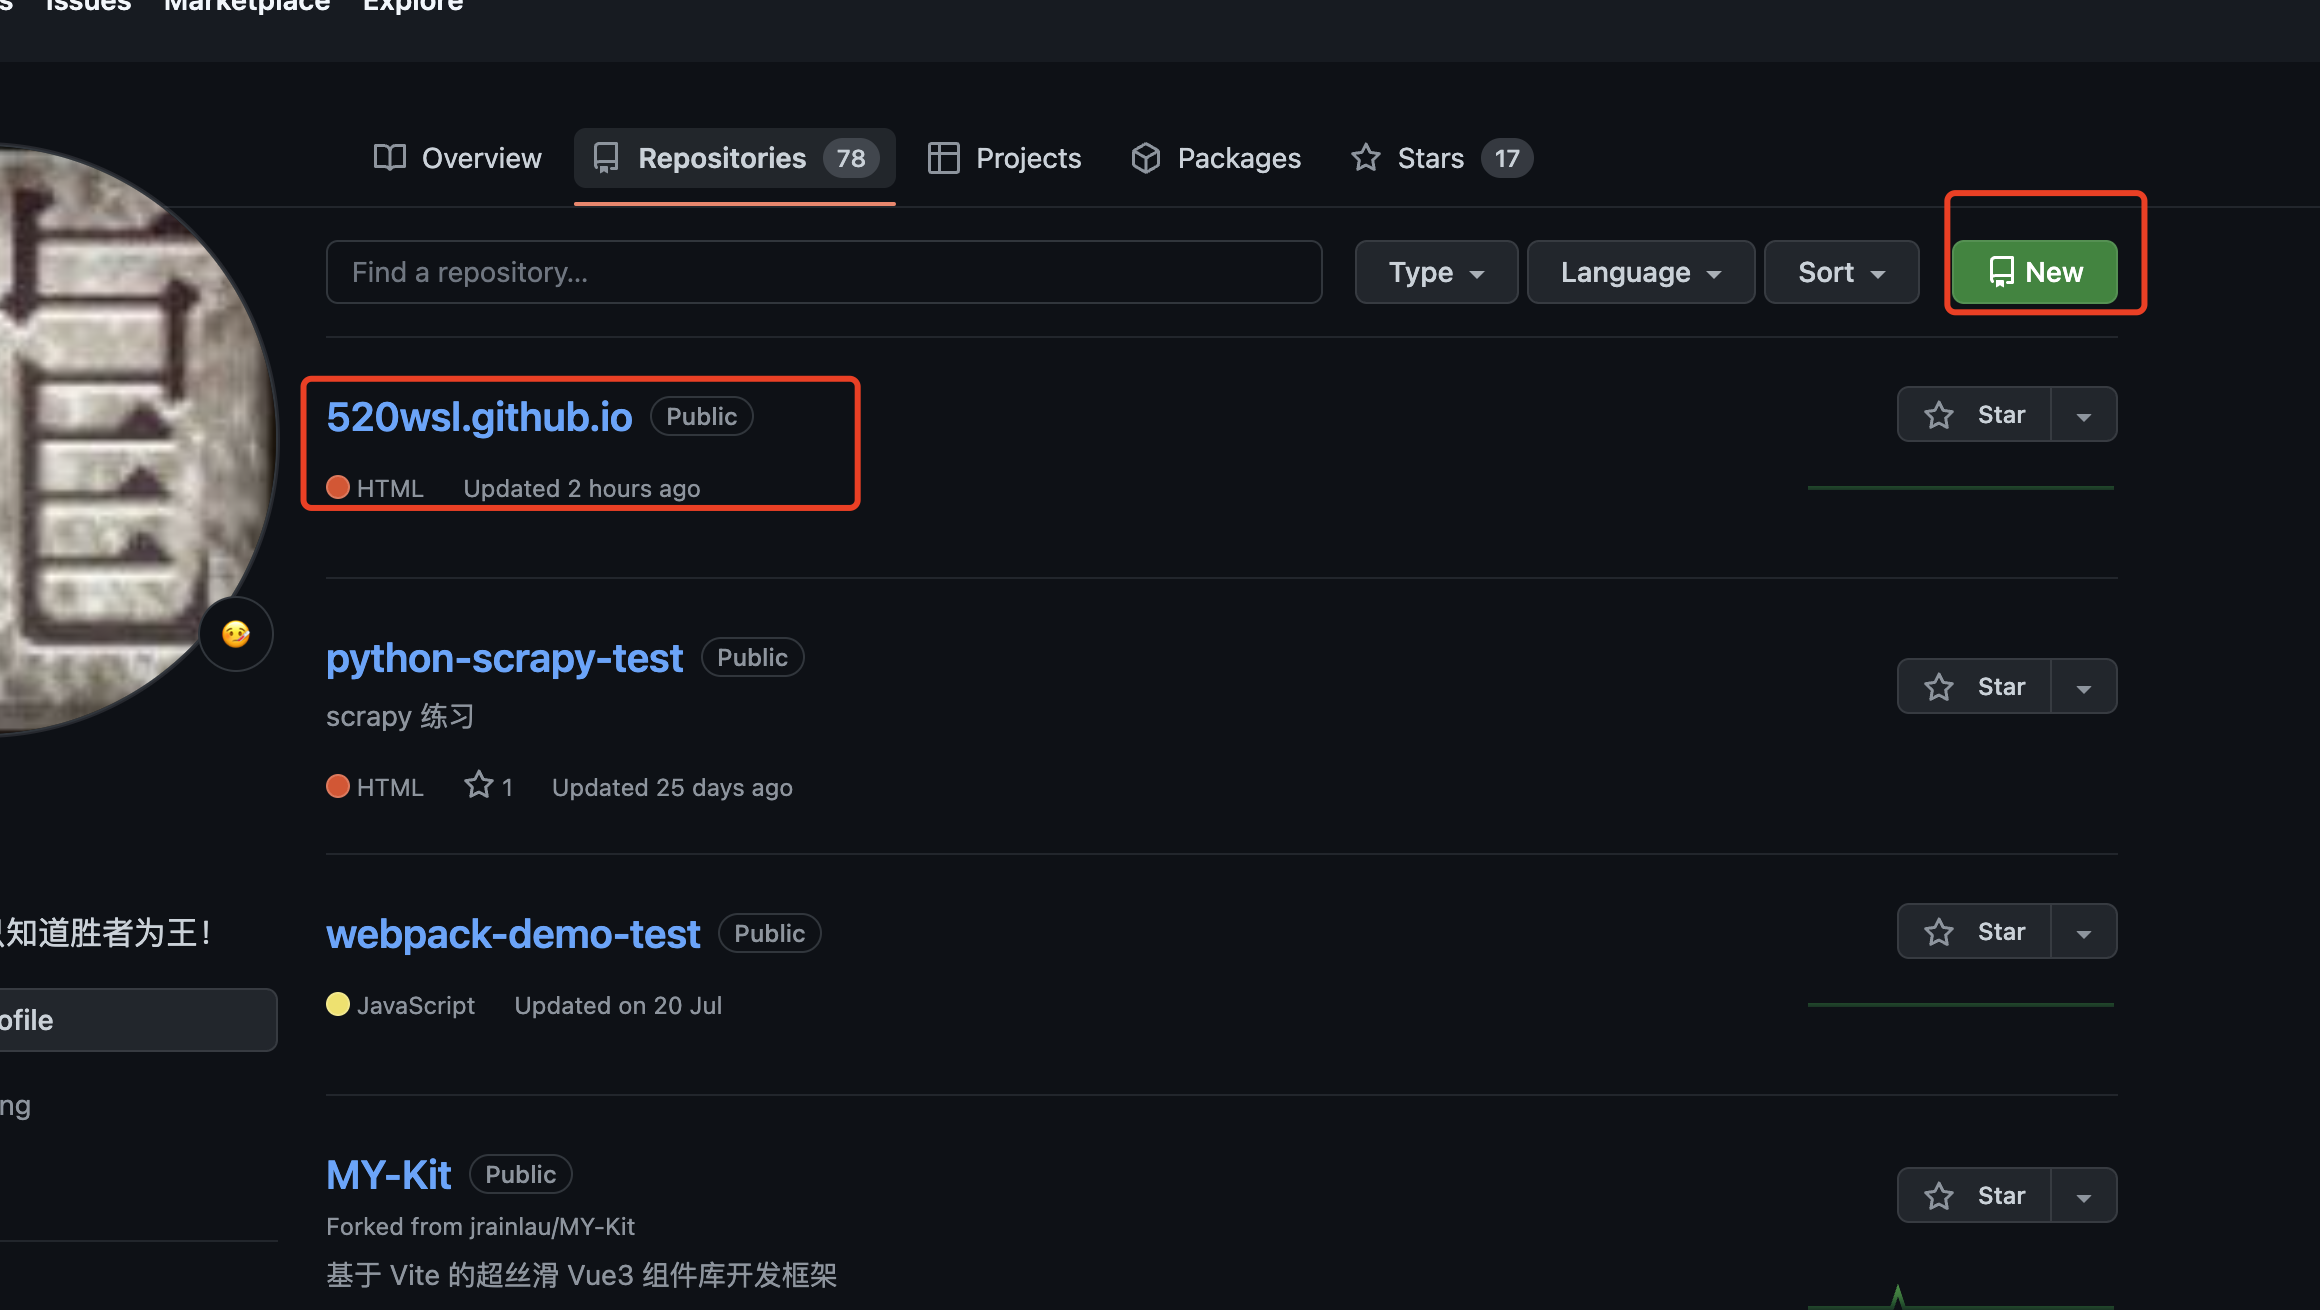
2、复制项目地址
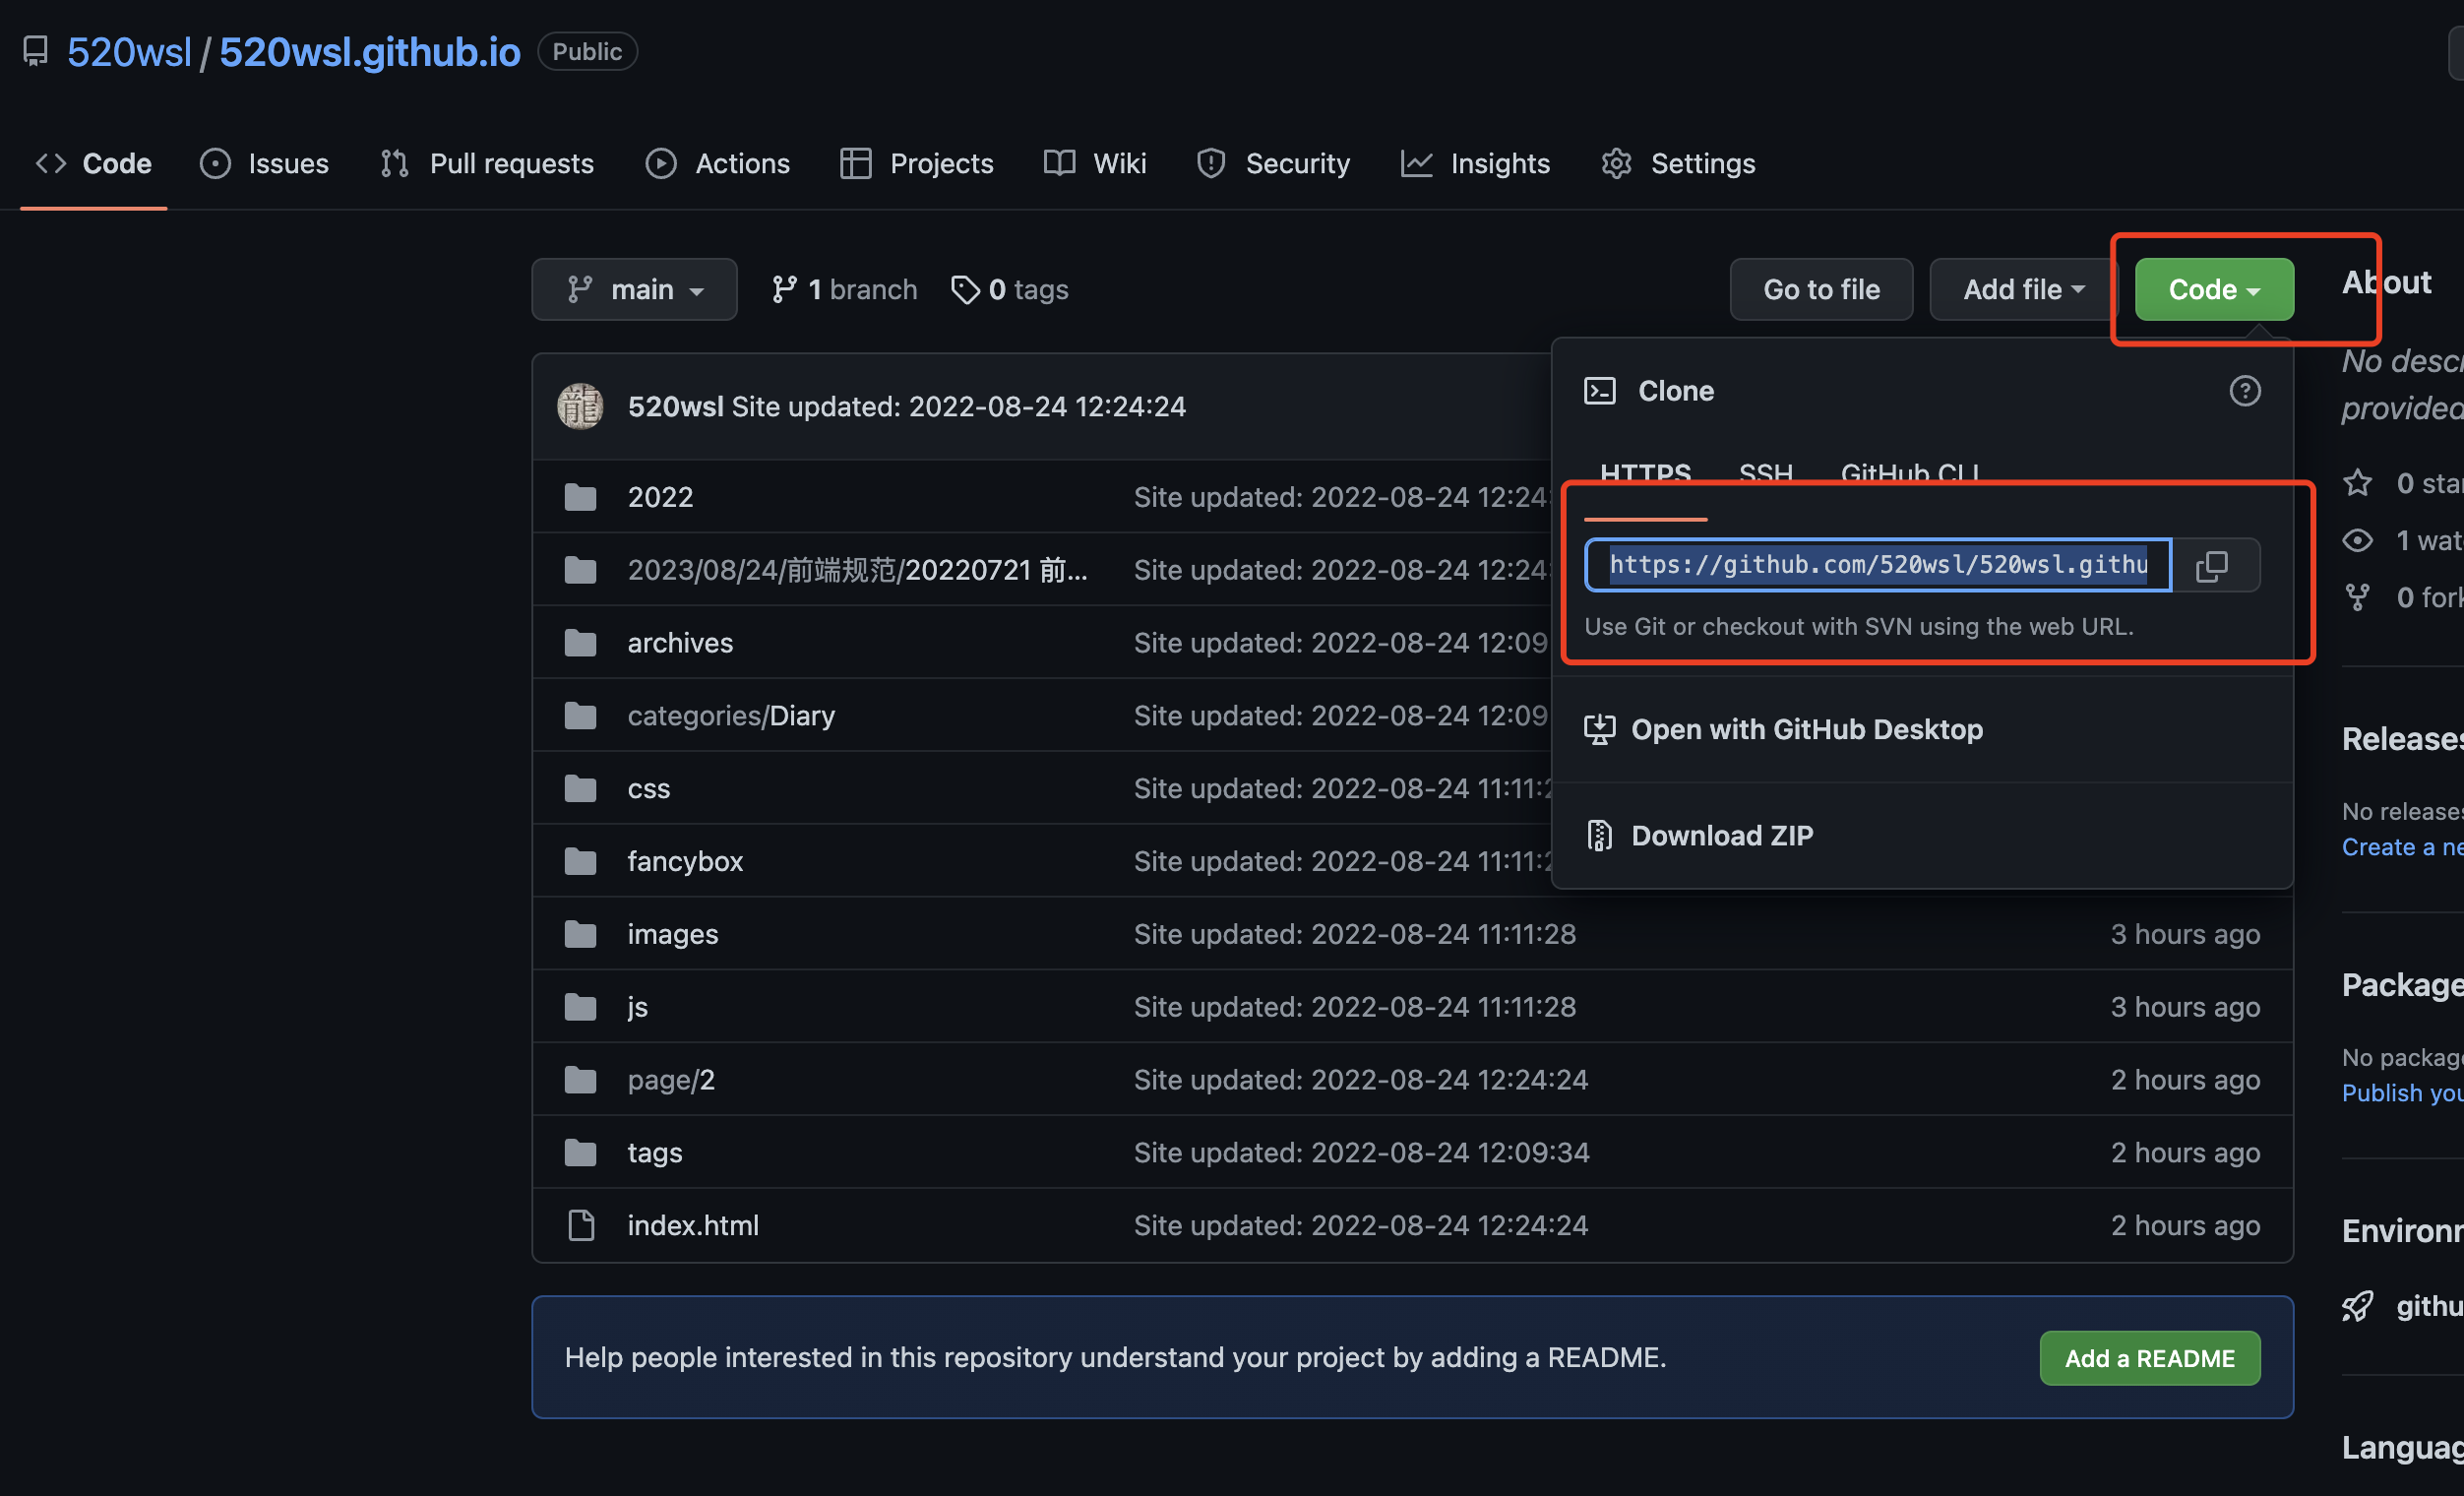
3、打开 hexo项目的_config.yml 文件,将该文件最底部的deploy关键字代码:
deploy:
  type:
修改为(注意:所有英文冒号后面都有一个空格, repository后面的是获取到的仓库地址)
deploy:
  type: git
  repository: https://github.com/xxx/xxx.github.io.git
  branch: main
4、安装hexo-deployer-git自动部署发布工具,即将hexo 部署到 git page 的 deployer
npm install hexo-deployer-git --save # yarn add hexo-deployer-git
5、推送到github
hexo clean && hexo deploy
6、推送后会提示填写用户名和密码
- 用户名是github的用户名
- 密码是上面生产的令牌(注意不是github的密码)
7、如下类似提示 推送成功
wangshilin@wangshilindeMacBook-Pro 520wsl % hexo clean && hexo deploy
INFO  Validating config
...
...
Enumerating objects: 34, done.
Counting objects: 100% (34/34), done.
Delta compression using up to 10 threads
Compressing objects: 100% (26/26), done.
Writing objects: 100% (34/34), 881.81 KiB | 15.20 MiB/s, done.
Total 34 (delta 4), reused 0 (delta 0), pack-reused 0
remote: Resolving deltas: 100% (4/4), done.
To https://github.com/520wsl/520wsl.github.io.git
 + a989e62...6690edd HEAD -> main (forced update)
Branch 'master' set up to track remote branch 'main' from 'https://github.com/520wsl/520wsl.github.io.git'.
INFO  Deploy done: git
wangshilin@wangshilindeMacBook-Pro 520wsl %
九、Github Pages 设置
1、进入仓库,找到Settings,向下翻最后面有Github Pages,点击Check it out here
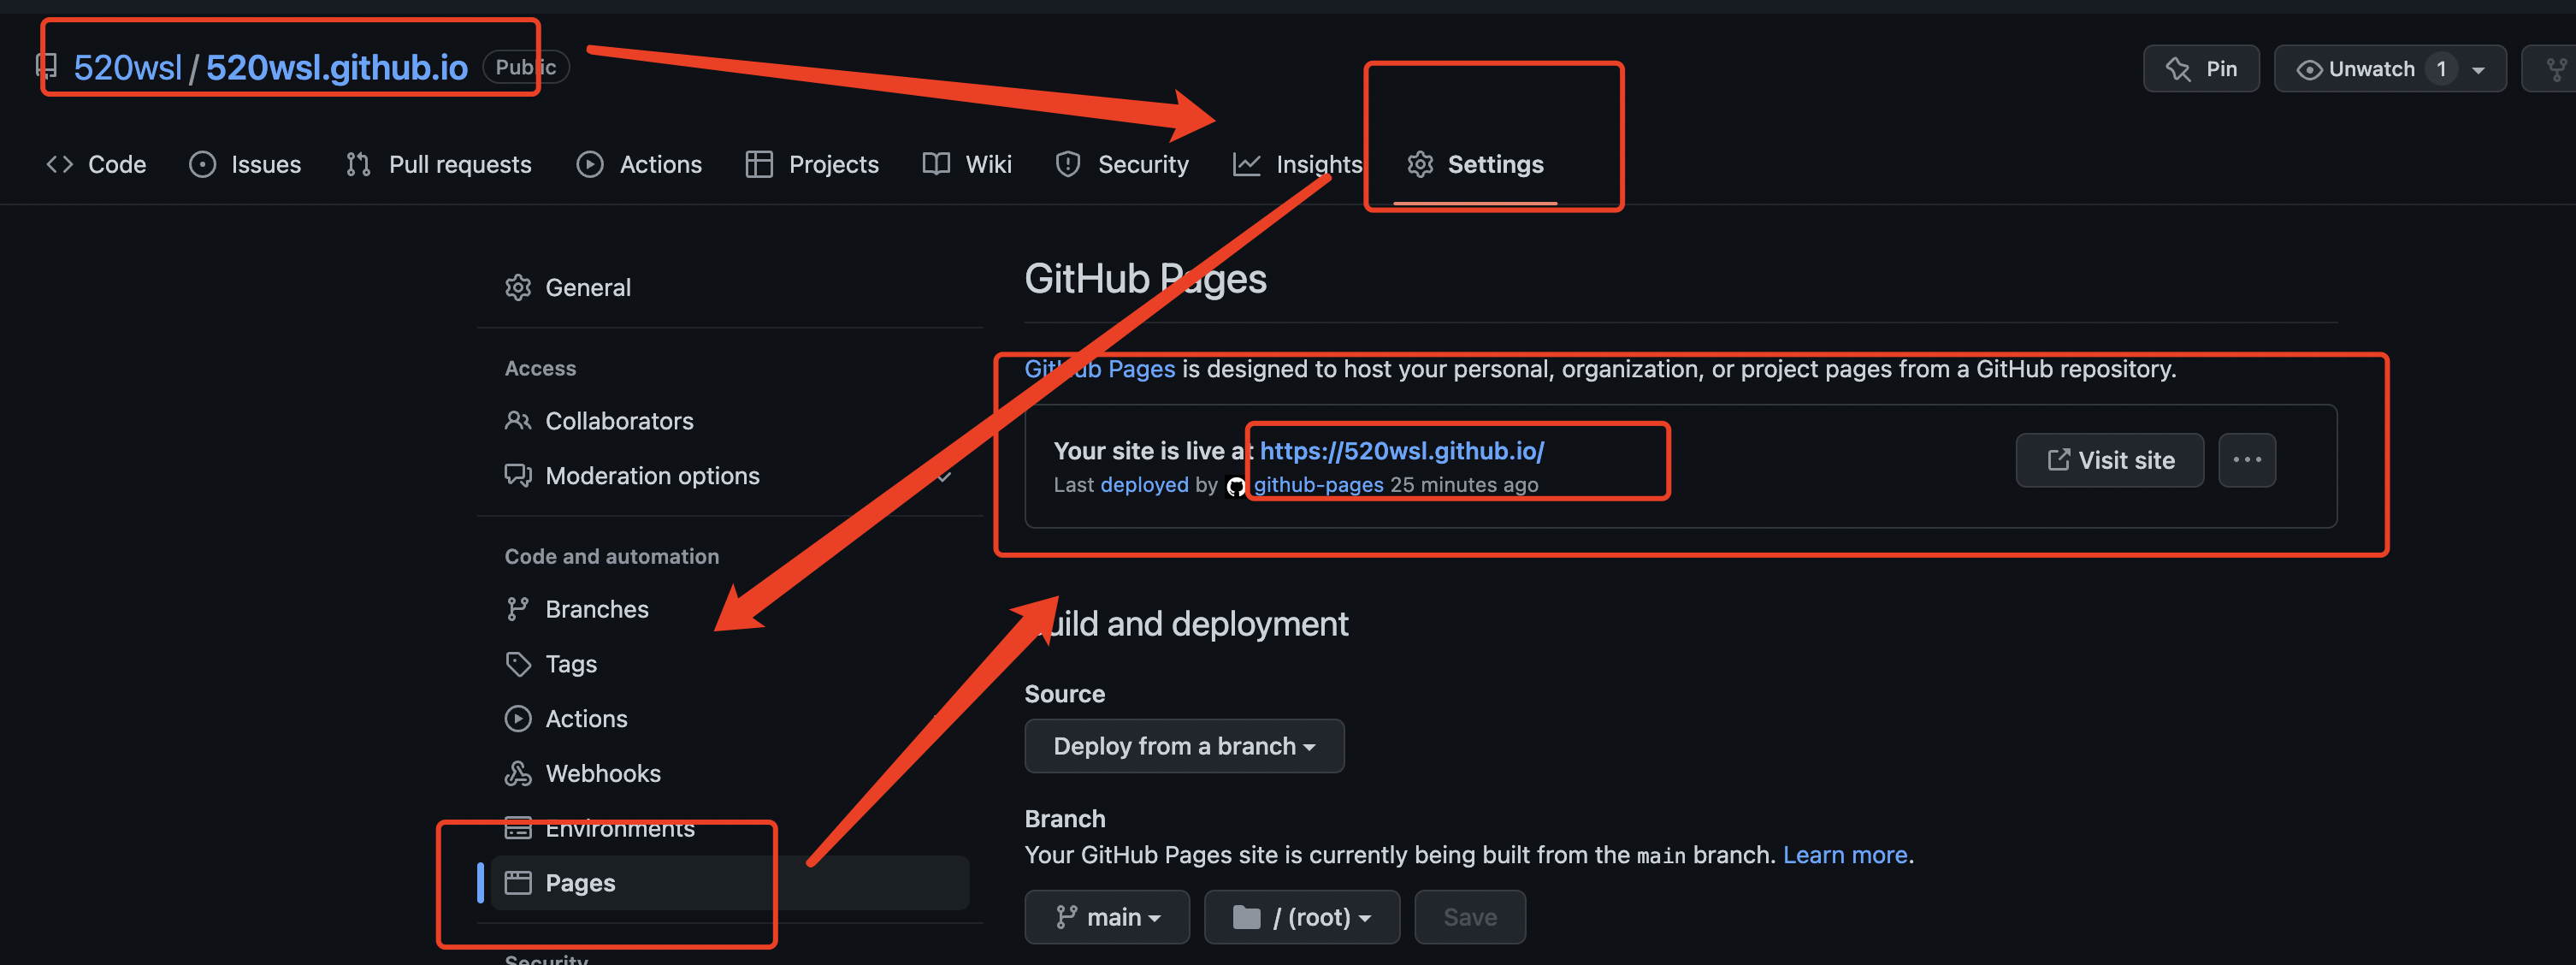
2、打开 https://youname.github.io/
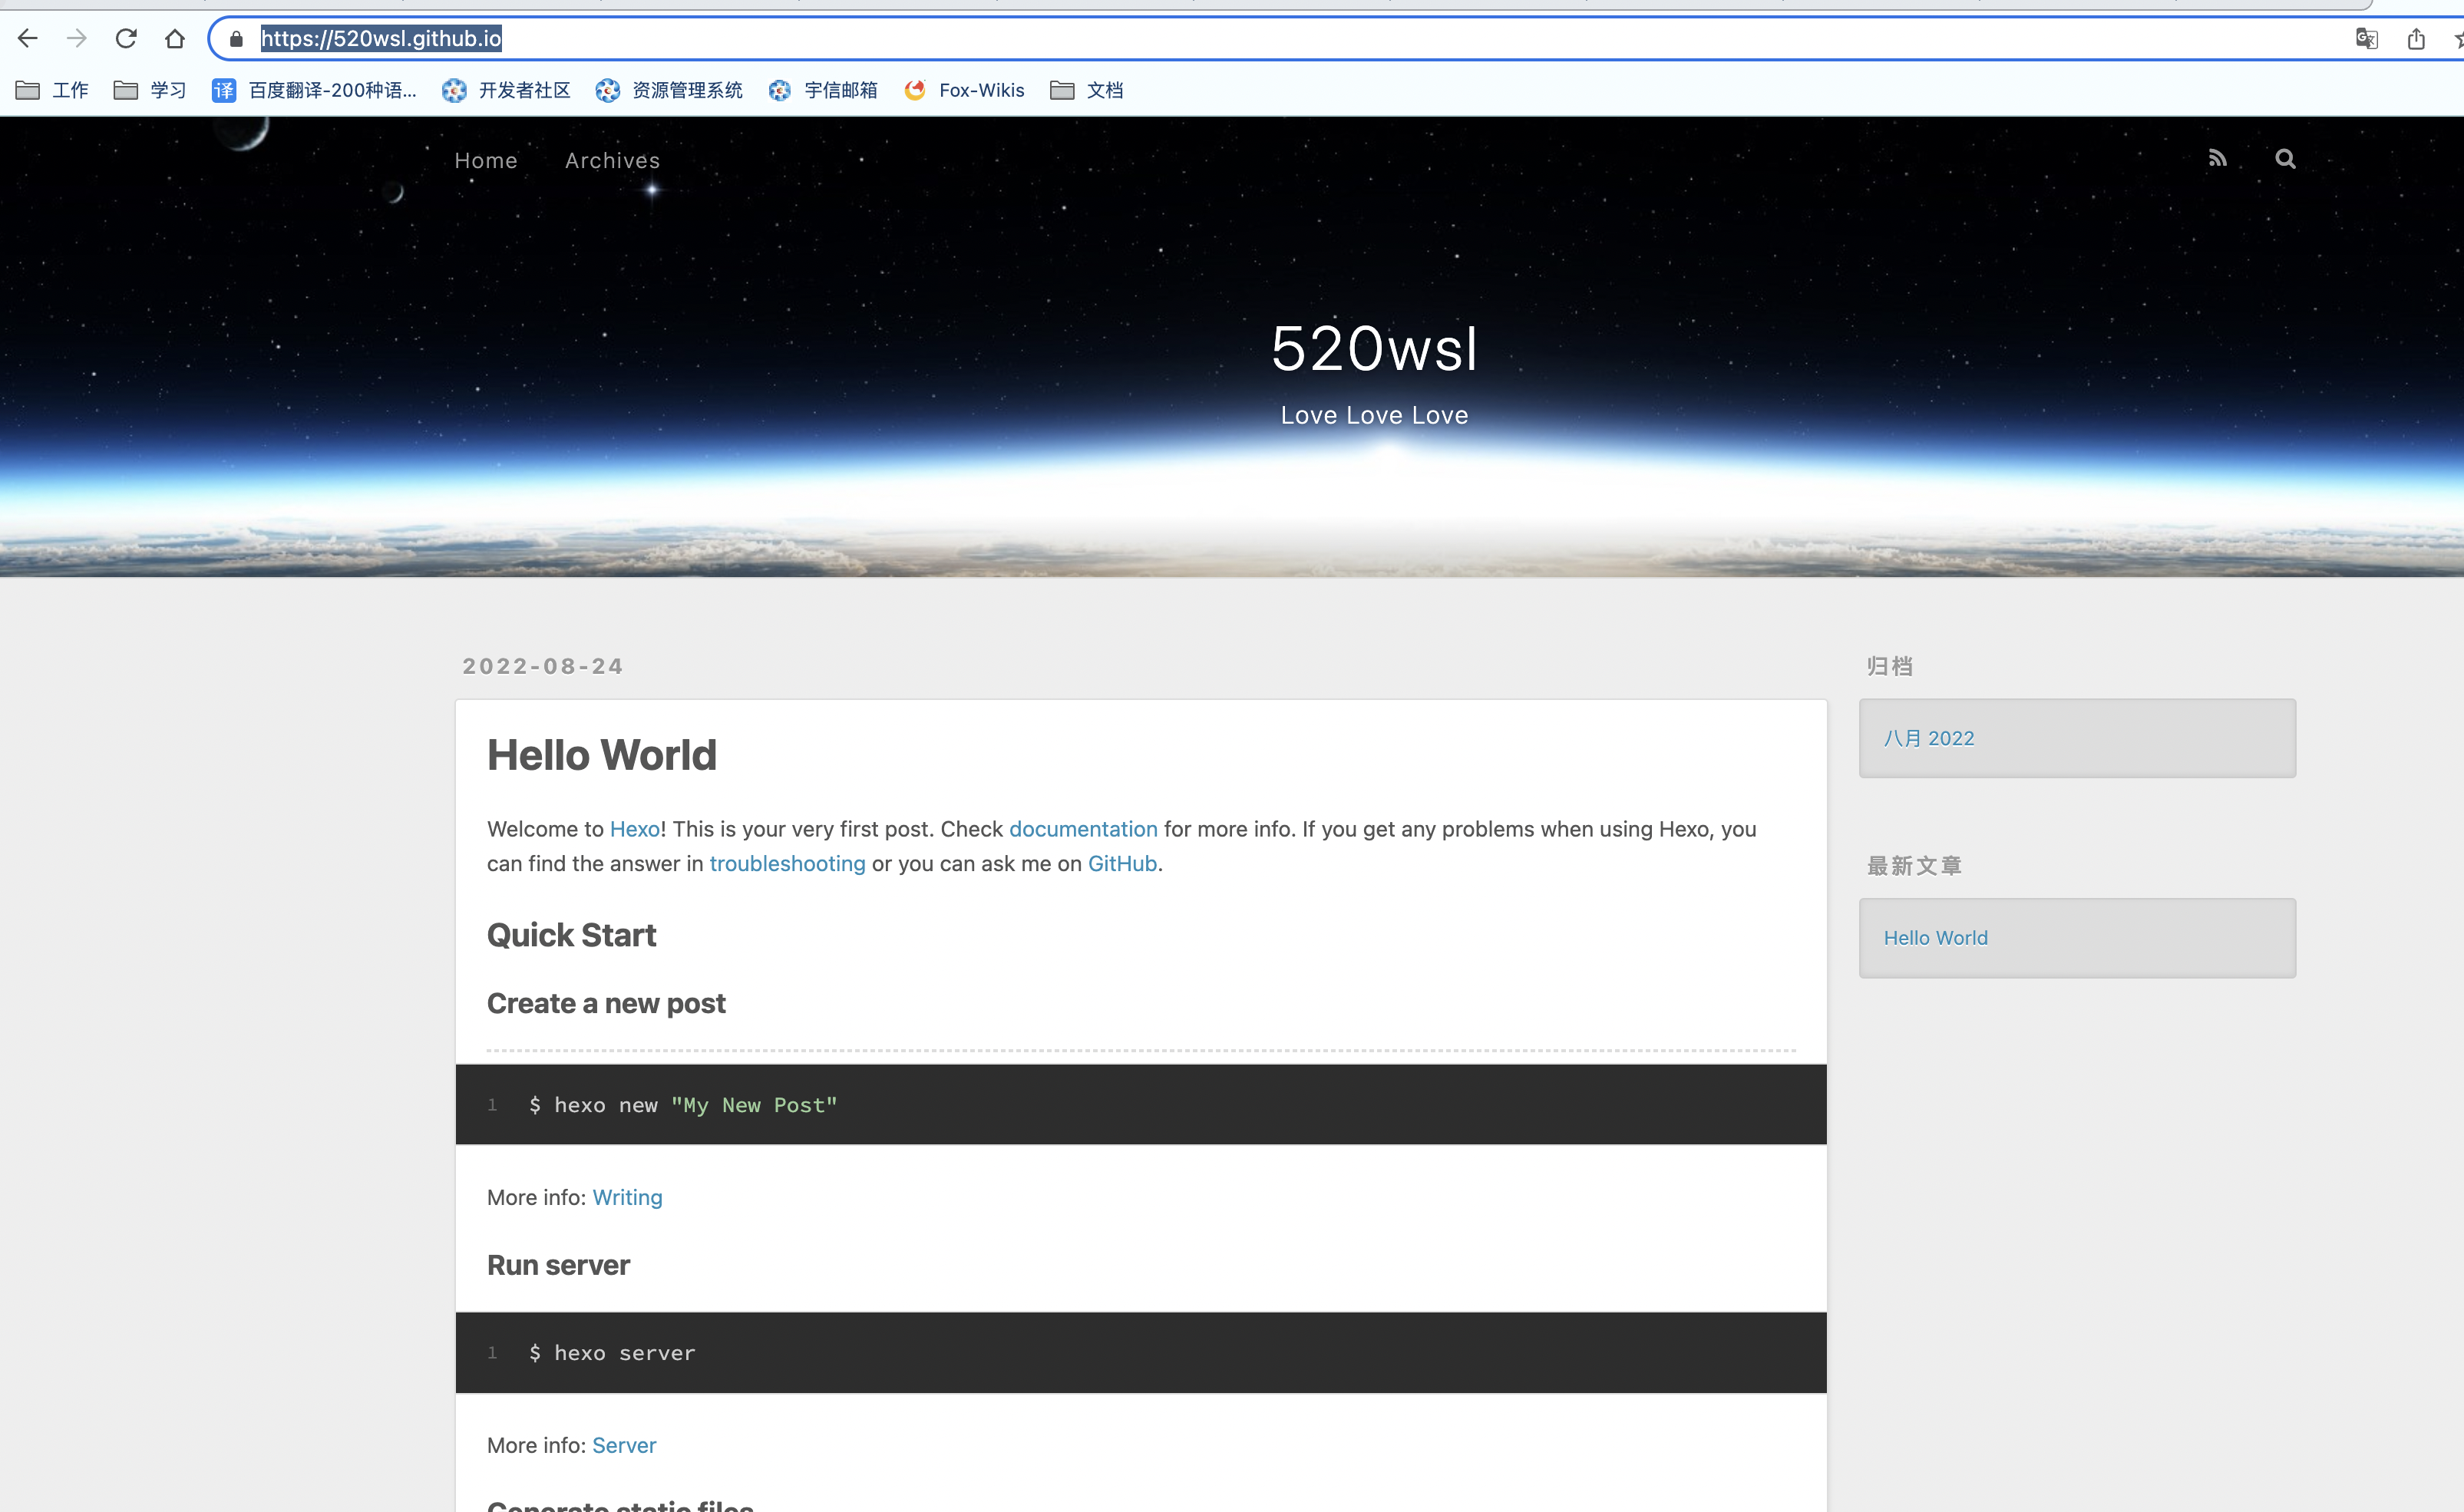
好了,现在你的博客可以被人看见了。开心吧😄